Subsection 12.1.5 Adding a Cover Page
Sometimes your professors will require you to preface your paper with a cover page. Cover page formats vary by citation style, but typically include the title of your paper, your name, course number/title, professor name, and assignment due date. The APA style requires university affiliation, a running header, and an author note instead of course, professor name, and due date. Remember that if you have any questions about how to format your cover page, it’s best to ask your professor for their preferences.
APA.
APA-style cover pages require your title, name, university affiliation, an author note, a page number, and a header that runs along the top of every page of the document. Generally this running header provides a short synopsis of the topic of your paper (but does not exactly copy your title).
To begin, place your double-spaced title, name, and university affiliation about one-third of the way down the page. If an author’s note is required, place this about two-thirds of the way down (and centered). An author’s note includes the departmental and institutional information of the student, any grants or funding associated with the project, and contact information by which to contact them.
![This image shows a screenshot of a word document APA cover page. All text is centered and double spaced. About one-third of the way down the page is the title, the following text "A Fascinating Title: Ensuring Maximum Attention-Grabbing from Your Reader." After one blank line is the author’s name: "Bethany Llewellyn [line break] Author’s Note." Two thirds of the way down the page is the text "[Author Note]."](external/tech-32.png)
To add the page number and running header, select the “Insert” tab, click “Page Number,” “Top of Page,” and “Plain Number 3.”
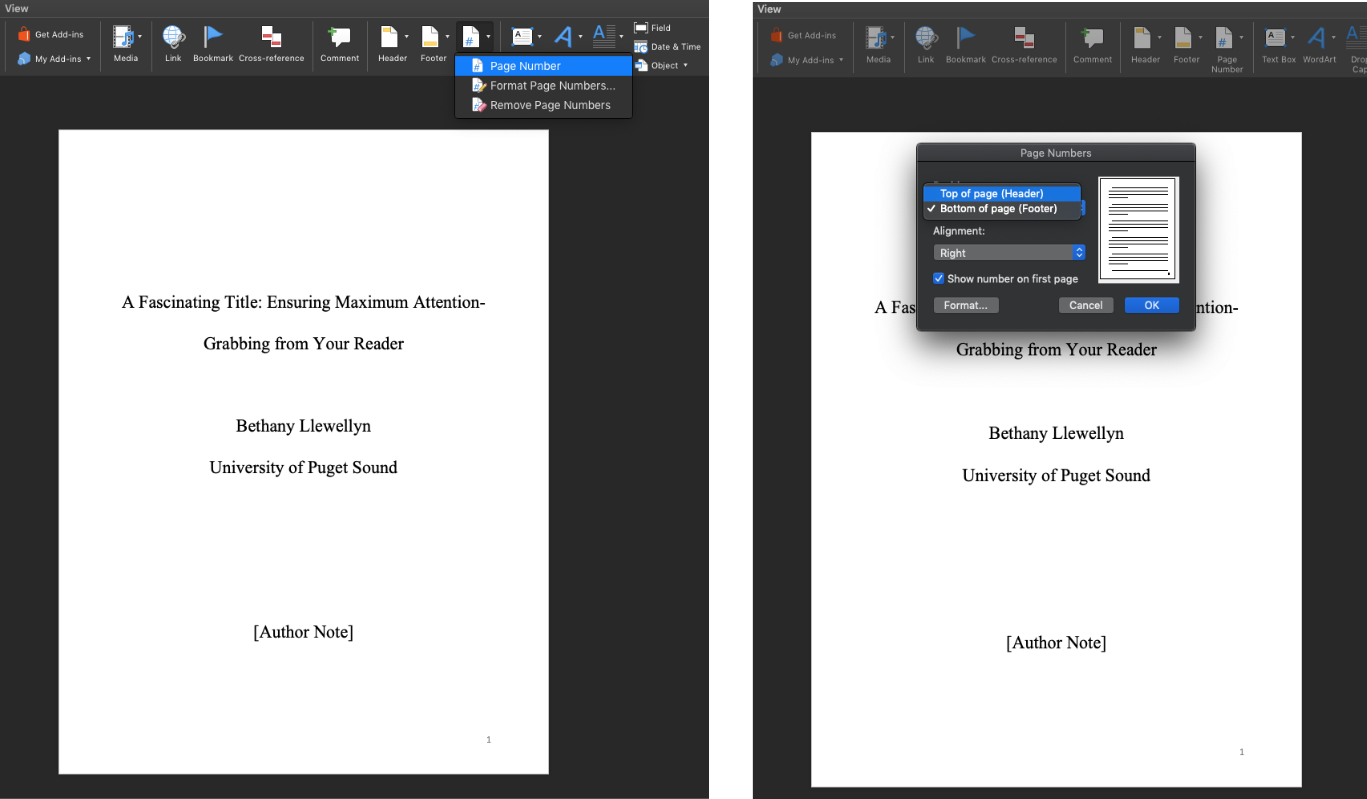
Next, you can add your running header in front of the page number by writing “Running head: TITLE.” To right-justify your running header, hit the “tab” key once. Keep in mind that your running header should not be more than 50 characters long.

Next, keeping your cursor on the header you just created, uncheck the “Different First Page” box in the “Design” tab. This will allow you to delete the term “Running head:” on subsequent pages.
When you have written subsequent pages, the running header will automatically be added to the top of each page. However, you no longer want the term “Running head:” to preface each subsequent header. To delete this from the following pages, place your cursor on the page 2 header, re-check the “Different First Page” box in the “Design” tab, and delete the “Running head:” from the header on page 2.
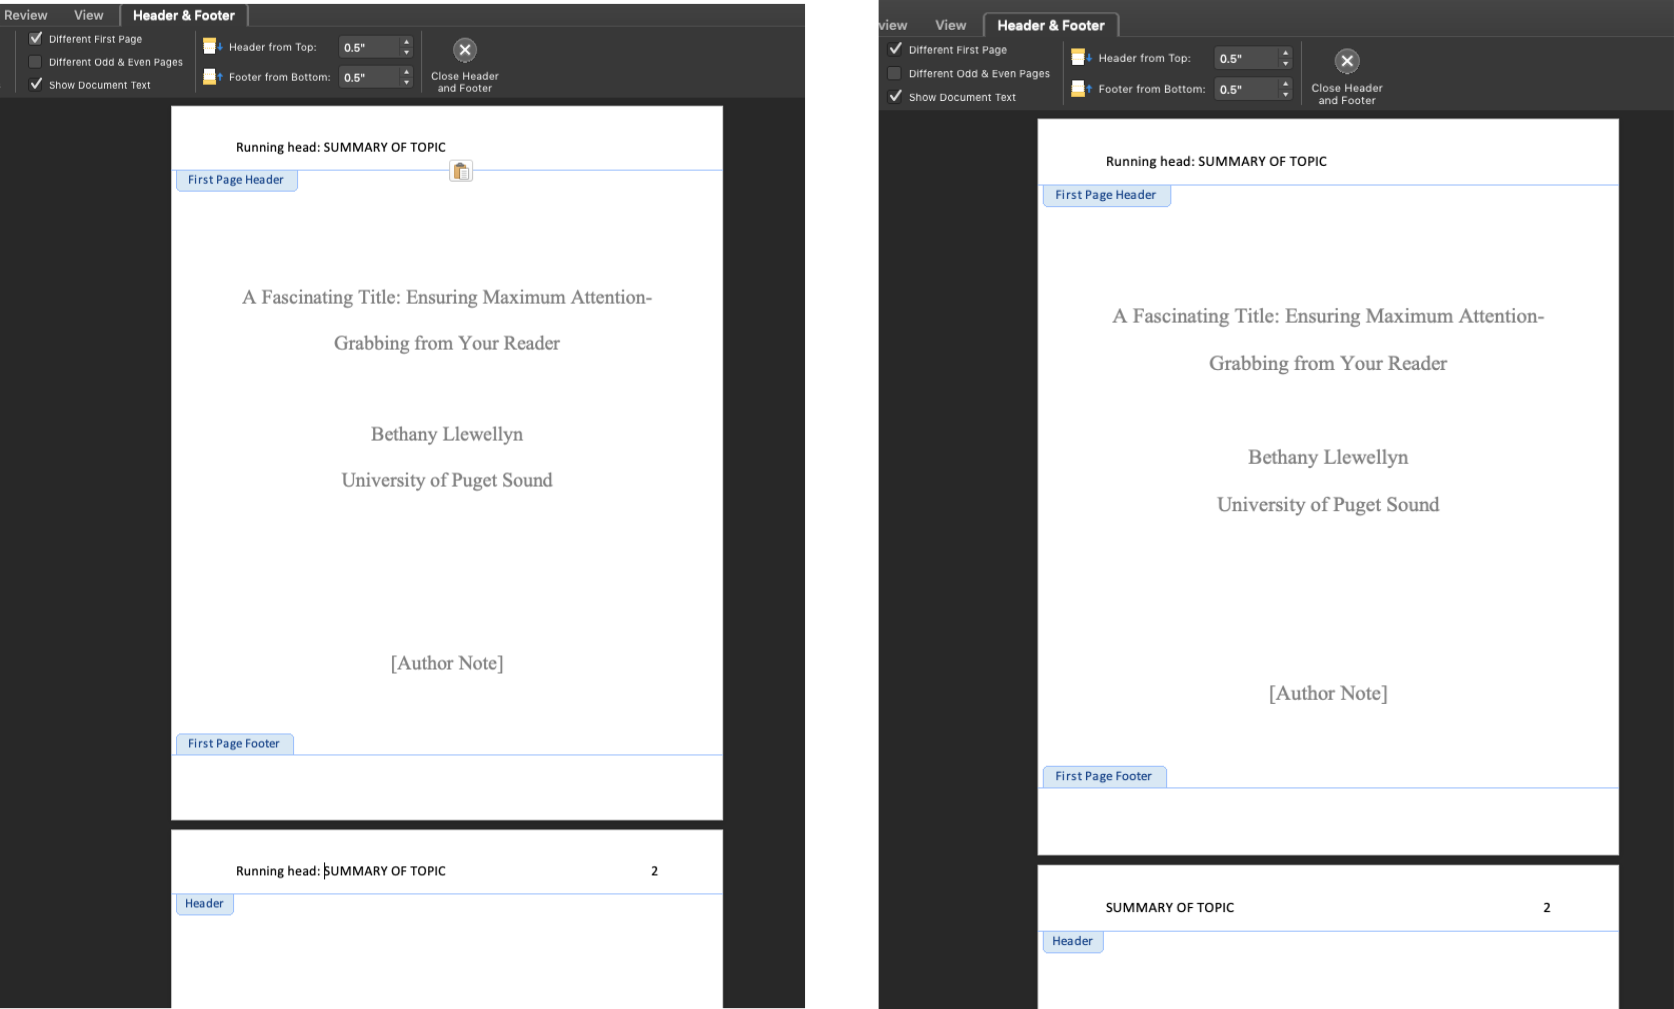
This will allow you to keep the “Running head:” title on the cover page, but will delete it from subsequent pages.
Chicago.
For a Chicago-style cover page, your title, name, course name and number, and assignment due date are single-spaced. You do not need to add your professor’s name (although doing so likely would not hurt). Your title is centered one-third of the way down the page; if it has a subtitle, separate it with a colon and place the subtitle on the next line. Your name, course name/number, and due date should all go about two-thirds of the way down and should be single-spaced.
![This image is a screenshot of a word document with text that is single-spaced and centered. One third of the way down is the following text: "A Fascinating Title: Ensuring Maximum Attention-Grabbing from Your Reader." Two thirds of the way down the page is this text: "Bethany Llewellyn [page break] Course Title and Number [page break] Assignment Due Date."](external/tech-38.png)
MLA.
To add an MLA-style cover page, simply shift down until your paper begins on the second page of the document (if you click “Different First Page” using the guidelines above for the APA cover page, a page number will not appear on this first page). Include your double-spaced title about one-third of the way down the page, followed by your name, course name and number, professor name, and due date about two-thirds of the way down (all double-spaced).
![This image is a screenshot of a word document with text that is double spaced and centered. One third of the way down the page is the following text: "A Fascinating Title: Ensuring Maximum Attention-Grabbing from Your Reader." Two thirds of the way down the page is this text: "Bethany Llewellyn [page break] Course Title and Number [page break] Professor Name [page break] Assignment Due Date."](external/tech-31.png)
