Logo image

Sound Writing

Section 12.3 Adobe Acrobat Reader

Step 1: Download Adobe Acrobat Reader.

Adobe Reader is the most common free PDF-viewing software used for the reading, searching, printing, and notating of PDF files. Adobe is great because it allows you to easily interact with your sources, offering a variety of annotation capabilities; in this way, it’s also more cost-efficient and environmentally friendly than printing out all 120 pages of that reading assignment because you can highlight and annotate most PDF types (although keep in mind your professor may like you to have a hard copy for class, anyways). To download Adobe Acrobat Reader DC, visit get.adobe.com/reader 1 .

Step 2: Do some research!

Put those great research skills to use! (If you need a refresher on how to get started, see Chapter 1.)

Step 3: Download your source.

When you find a source you want, download it and save it to your research folder or desktop.
This image is a screenshot of a scholarly journal article open in a web browser. A red arrow points to the "Download PDF" button in the upper right corner.
If you have installed Adobe Acrobat Reader, your document should be automatically saved as an Adobe Acrobat PDF file. After it’s saved, you can then open it, and it should open with Adobe Acrobat.
This image is a screenshot of the same article shown in the previous image, now open in Adobe Acrobat.
Yay! Now you can begin exploring all of the annotation capabilities Adobe has to offer.

Step 4: Annotate to your heart’s content.

There are several different ways to annotate a PDF document in Adobe Acrobat. We’ll highlight some of these capabilities below.
Commenting
You can easily comment on certain parts of the source document by selecting the small speech bubble icon on the right side of the toolbar and clicking on the part you want to comment on. A small window text box will appear wherein you may leave notes/questions to yourself about the text, observations about how to use a certain piece of information, or reminders to do more research elsewhere. You can also engage in a dialogue with yourself (or others if you are collaboratively examining a source) by replying to these comments later on.
A screenshot of the same article above; the word "vagility" is highlighted in blue. A red arrow points to the comment button on the top toolbar, which is a small symbol like a speech bubble.
In the same article shown in the previous image, a comment has been added on the word "vagility." The comment is indicated by a small yellow square with a white symbol identical to the comment button. The comment is open in the margin and reads, "Vagility: ability to disperse/move from place to place."
Highlighting
You can also easily highlight sections of the text using the highlighter function, making it easier for you to go back later and identify significant pieces of information. To do this, click on the highlighter icon on the far right of the toolbar (next to the comment icon) and select the section of the text you’d like to highlight (but try not to over-highlight!). See Section 2.3 for tips on how to annotate effectively).
A screenshot of the same article open in Adobe Acrobat; the highlight button in the upper toolbar, which is a symbol of a highlighter, is emphasized with a red box and arrow. Several sentences of text near the end of the page have been highlighted in yellow.

Note 12.3.1. Highlighting.

While this highlighting technique works for most PDF files, some files that have been photocopied don’t have the right line-spacing to accommodate the highlighter function. However, Adobe is smart; in these cases, an option to highlight manually using a box-select tool should be available.

Unlocking More Annotation Tools.

To unlock a host of other annotation functions, select the “Tools” tab at the top left of the screen; a screen of icons will appear. Select the “Comment” option at the top left of the screen.
In a screenshot of an open Adobe Acrobat window, a red box is around the "Tools" option to the left of the top toolbar. The tools menu is open, with small pastel icons indicating more than a dozen tool options. The "comment" tool, again indicated by a small yellow symbol like a speech bubble, is boxed in red and emphasized by a small red arrow.
The source document will reappear with a new toolbar below the original. Here you’ll notice the commenting and highlighting icons along with a slew of other editing features.
In this screenshot, the same journal article as above is open in Adobe Acrobat, but an additional toolbar featuring various icons has been added and is outlined in red.
These features include the following:
Underlining
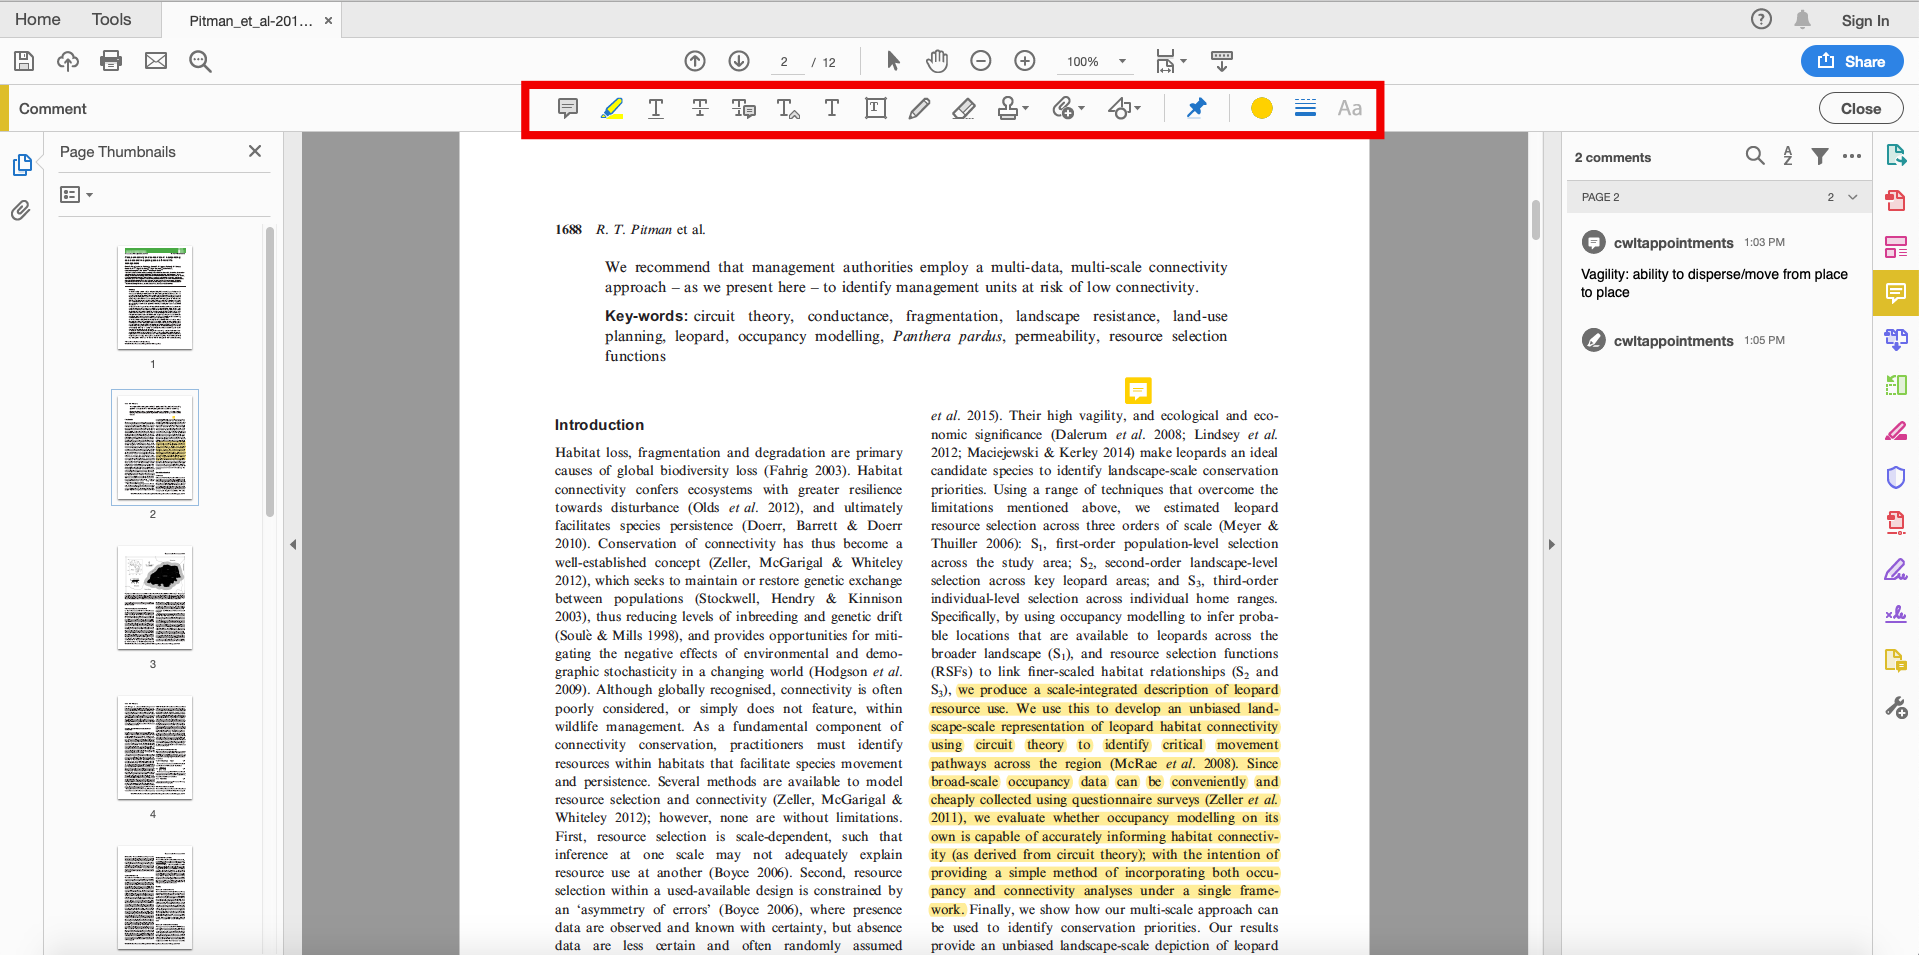
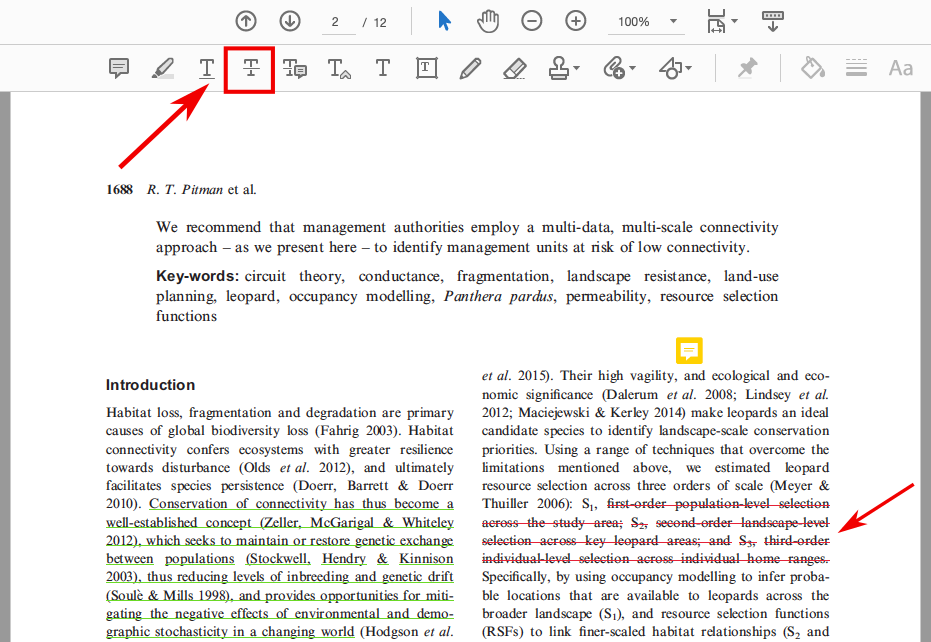
To underline a section of text, select the third icon from the left (“T” with a line underneath) and highlight the section of text you want underlined. A green line will appear beneath the section of text.
In this screenshot the underline option in the new toolbar, which is indicated by a capital "t" that is underlined, has a red box around it and is indicated by a red arrow. In the text of the article, several sentences have been underlined in green and a second red arrow points to them.
Strike-Through
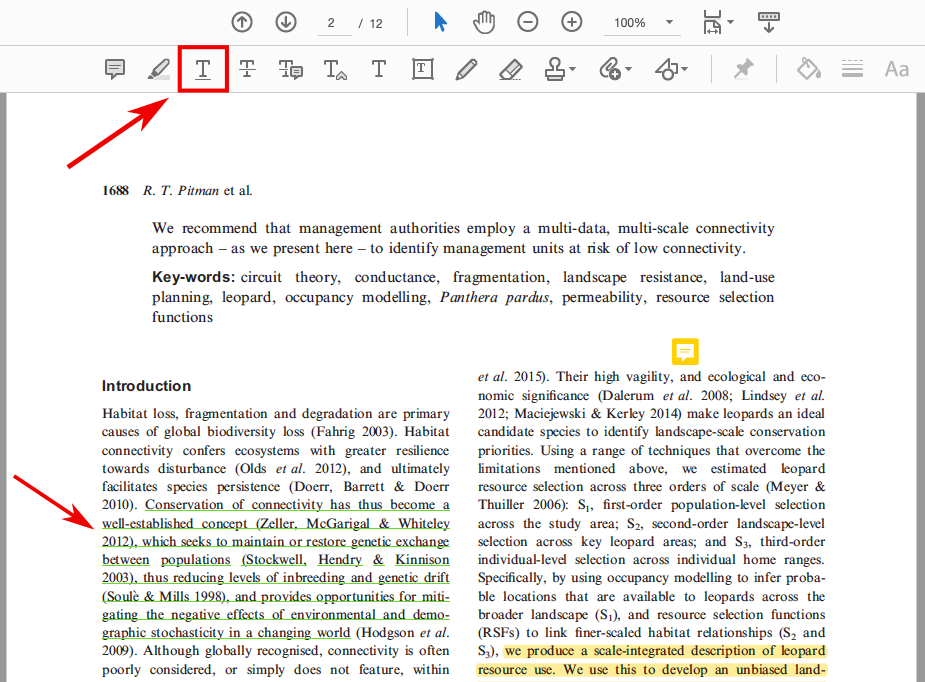
If you’d like to strike-through a section of text (particularly useful if you’re editing one of your own pieces or if you want to identify a part of the source document with which you do not agree), select the icon fourth from the left (“T” with a strike-through) and highlight the desired section of text. A red line will strike through this section of text.
In this screenshot the strikethrough button, immediately to the right of the underline button and indicated by a capital "t" with a line through it, has a red box around it and an arrow pointing to it. Several sentences of text have been struck through in red and are indicated by a red arrow.
Replacing Text
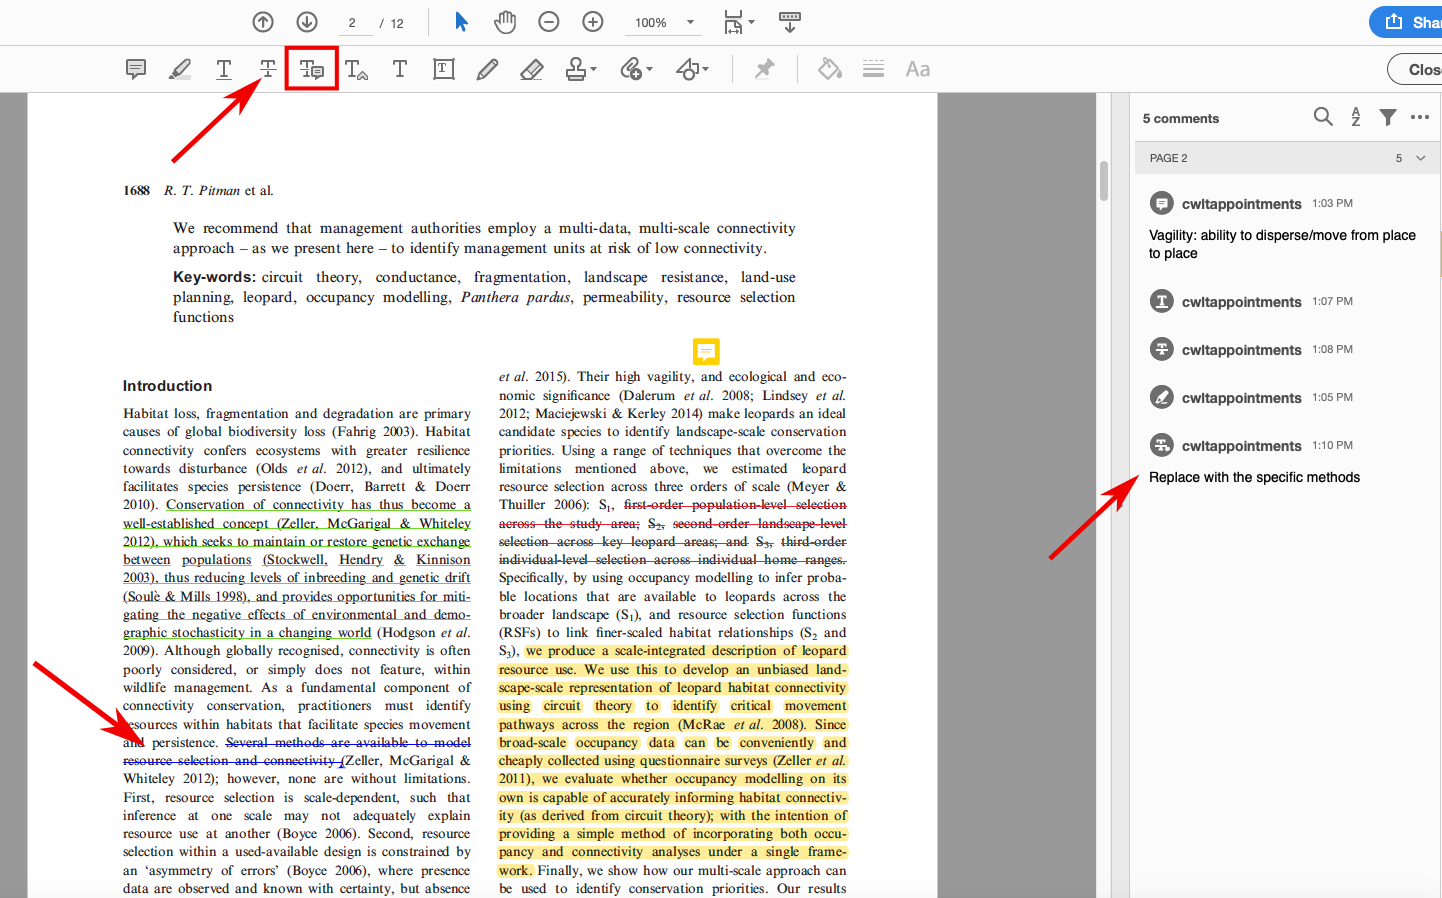
If you’d like to replace text (not so useful for annotating published source documents, but especially useful if you’re editing yours or another’s paper), select the fifth icon from the left (“T” with a strike-through and a speech bubble) and highlight the section of desired text. A blue line will strike through this section of the original text and a window text box will appear allowing you to write the text you want to replace it with.
This image is a screenshot of the same PDF document shown above open in Adobe Acrobat. The replace button in the toolbar, which is to the right of the strikethrough button and indicated by a capital "t" with a line through it and a small speech bubble next to it, is outlined in red and has a red arrow pointing to it. In the main text, several lines are struck through in blue, and also indicated by a red arrow. A bar on the right side of the screen shows the replacement text, which reads "Replace with the specific methods."
Inserting Text
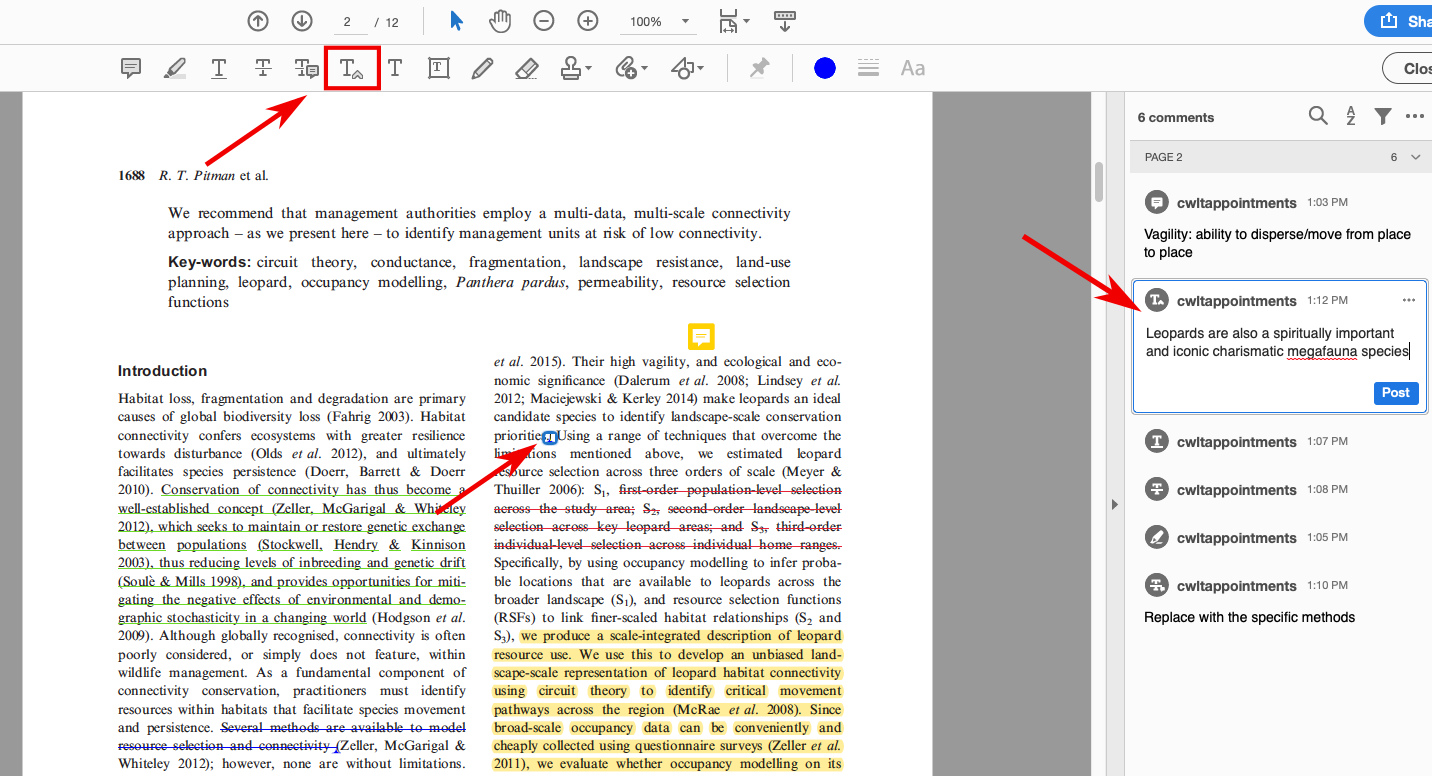
If you’d like to insert text (again, more useful for documents you are actively editing than source documents you are annotating), select the sixth icon from the left (“T” with a subscript carrot) and place your cursor in the place in the text where you’d like to insert new text. A small blue box with a carrot will appear in the text, while a window text box will allow you to write the text you’d like to insert.
This image is a screenshot of the same PDF document shown above open in Adobe Acrobat. The insert button in the toolbar, indicated by a T with a subscript carrot next to it, is outlined in red and has a red arrow pointing to it. In the text, a small blue box with a carrot in it also has a red arrow pointing to it. In a column to the right of the page, a symbol that looks like the insert button is followed by the inserted text, which reads "Leopards are also a spiritually important and iconic charismatic megafauna species."
Adding Text Directly
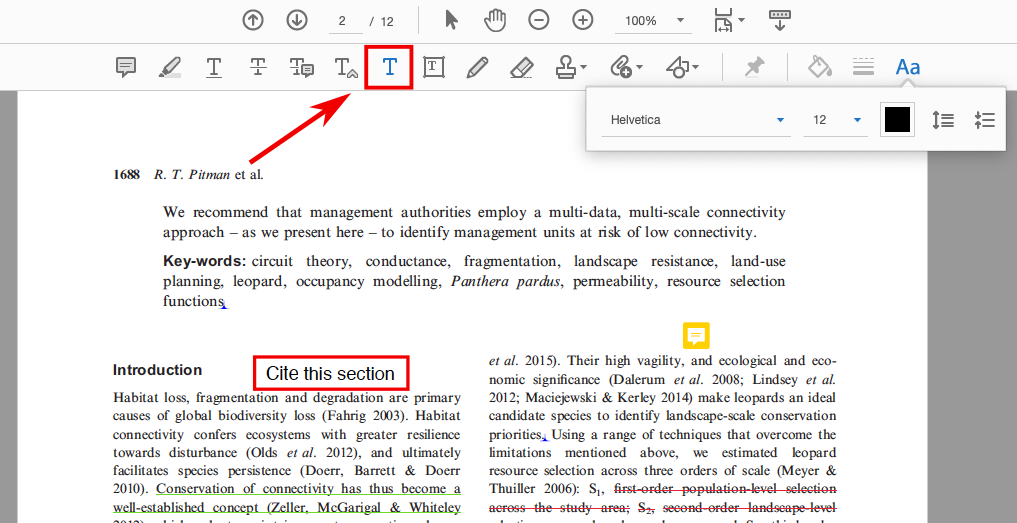
If you’d like to add text directly onto the document (useful if you want to more easily view your comments), select the seventh icon from the left (plain “T”) and highlight the area you’d like the text to go. Begin writing and your comment will appear directly onto the document.
In this screenshot of the same PDF document, the add text directly button, which is simply a capital "t," has a red square around it and a red arrow pointing to it. In the article, next to the word "introduction," the text "Cite this section" has been added in a different font and is outlined in red.
Adding a Text Box
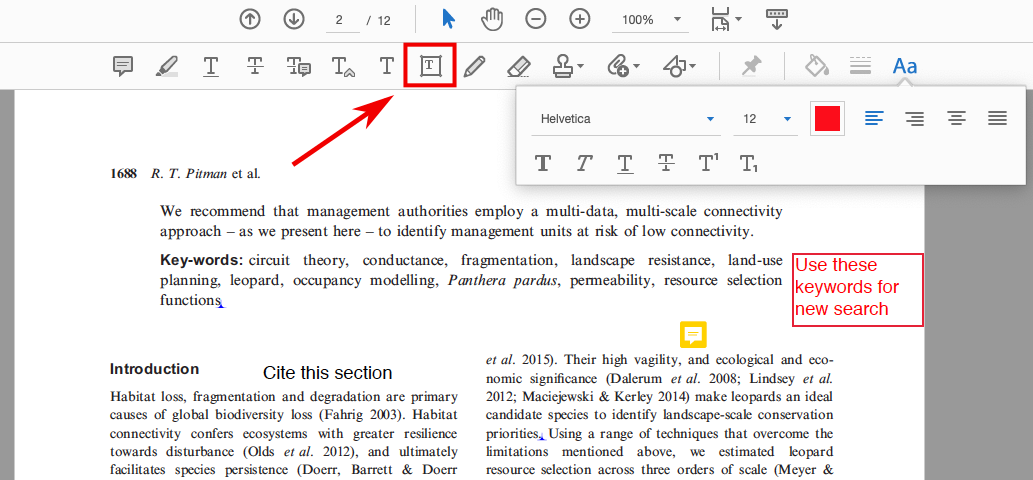
Another way to add text directly onto a source document is to create a text box. To do this, select the eighth icon from the left (“T” within a box) and create the text box where you want it on the document. A red text box will appear in which you can write your comment.
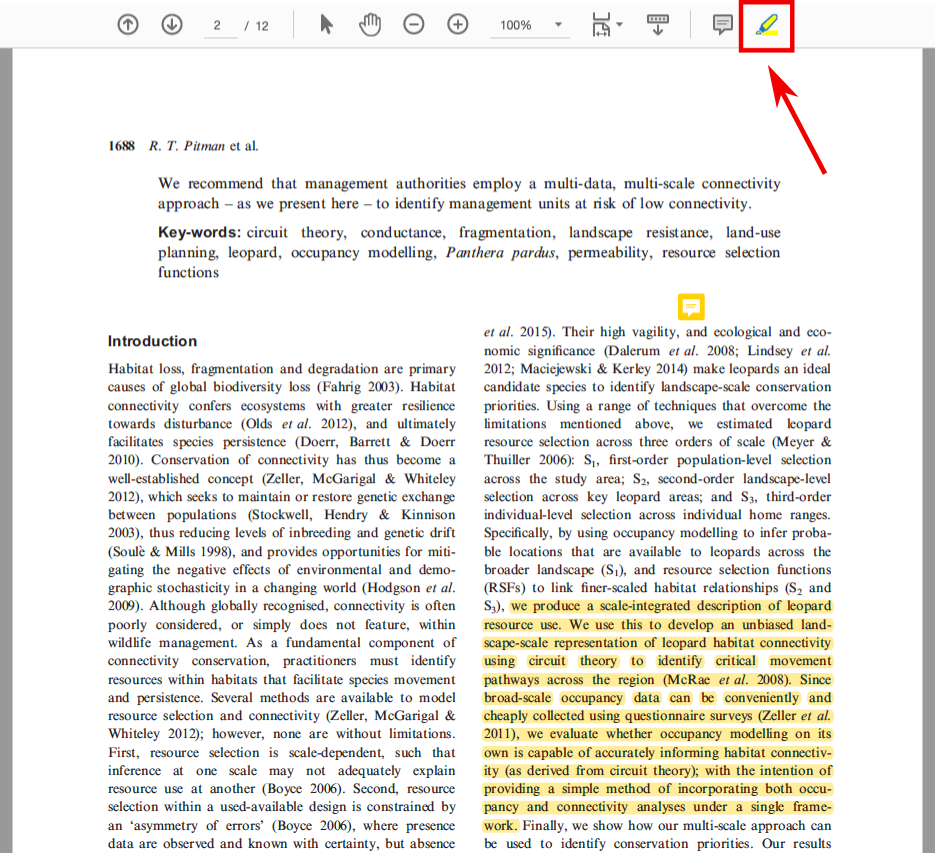
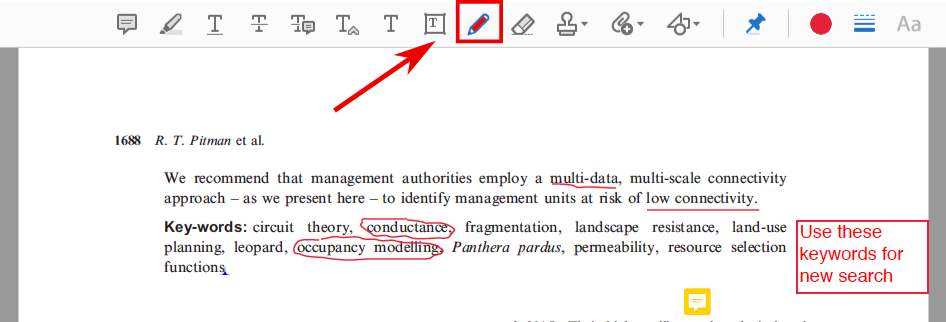
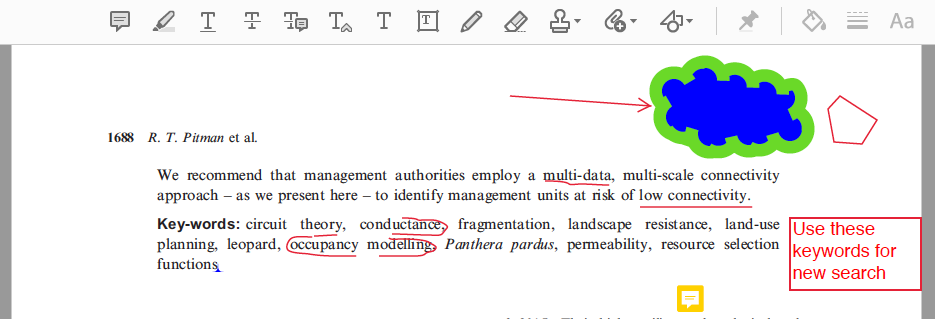
In this screenshot the add a text box button, which is an icon of a capital "t" in a small box, has a red box around it and a red arrow pointing to it. In the margin of the document, a red text box has been added and contains the following text: "Use these keywords for new search."
Drawing Free-form
You can also draw free-form on the document to emphasize certain sections or (if you’re good at drawing using a mouse or touchpad, which I am not) even draw pictures or write comments to annotate the document. To do this, select the ninth icon from the left (pen) and begin to write/draw in red pen anywhere on the document.
In this screenshot the free-form drawing button, which is an icon of a red pencil, has a red box around it and a red arrow pointing to it. In the text of the article, the keywords "conductance" and "occupancy modelling" are outlined in red free-form lines. The words "multi-data" and "low connectivity" in the introduction are also underlined with free-form red lines.
(Like I said, I’m not that artistically savvy.)
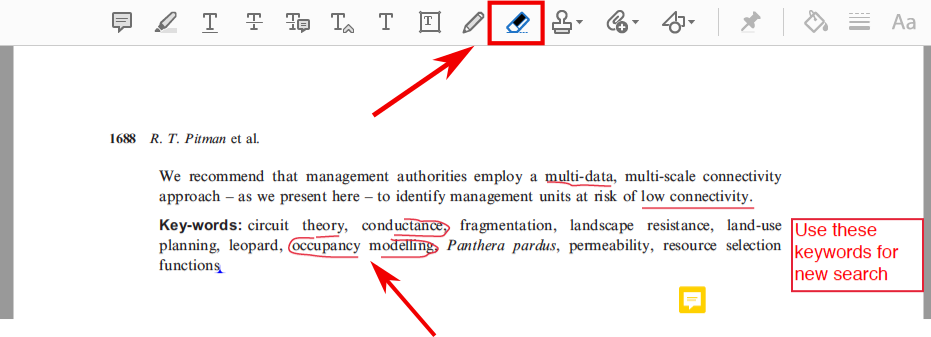
Erasing
If you’d like to erase something you’ve drawn, you can also do this by selecting the tenth icon from the left (eraser) and moving it over your drawing to erase it.
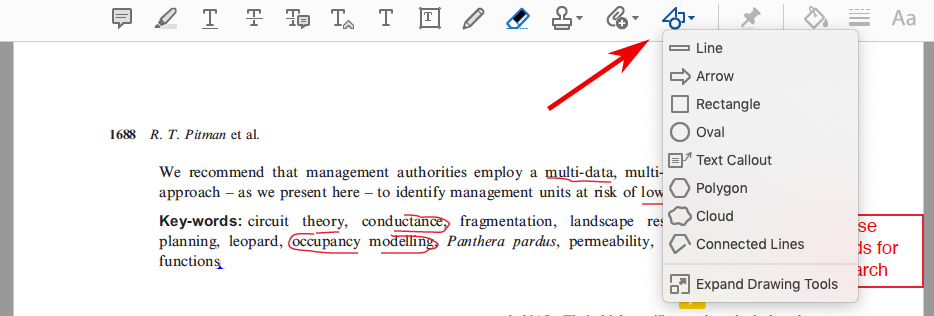
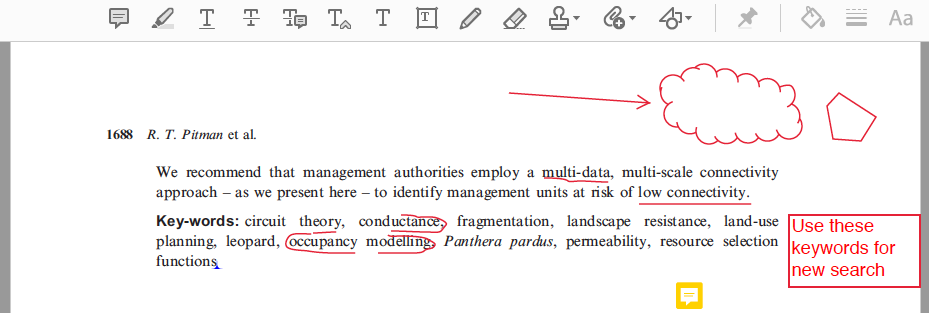
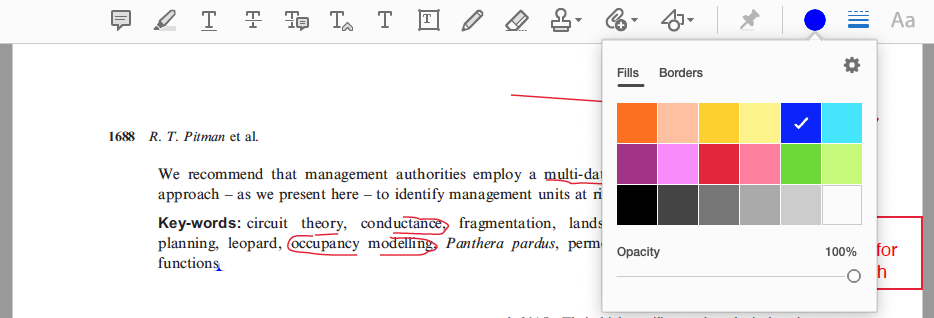
The erase button, which is a small black and white eraser, is in a red box and indicated by a red arrow. In the text, part of the free-form lines added in the previous image have been erased and are indicated by a red arrow.
Adding Shapes
If you’re more artistically/visually inclined, you can also add pre-formed shapes to your document to draw emphasis to certain sections or have fun while you annotate. To do this, select the thirteenth icon from the left on the toolbar (cluster of shapes), and use the drop-down menu to select which shape you’d like to draw.
In a screenshot of the same PDF shown above, the toolbar button to add shapes is indicated by a red arrow. A drop-down menu is open below it, showing the following shape options with names and small outlines of the shapes: line, arrow, rectangle, oval, text callout, polygon, cloud, connected lines.
In this screenshot, red outlines of a cloud shape and a trapezoid shape have been added and a red arrow points to them.
You can also change the color, opacity, and line thickness of your drawing tools by selecting paint bucket and line-thickness icons at the far right of the toolbar.
In this screenshot, a blue circle in the toolbar has an open drop-down menu with a palette of colors and dark blue selected with a small check mark.
In this screenshot, the previously shown cloud shape is now outlined in line green and filled with dark blue.
Go wild! (But not too wild.)
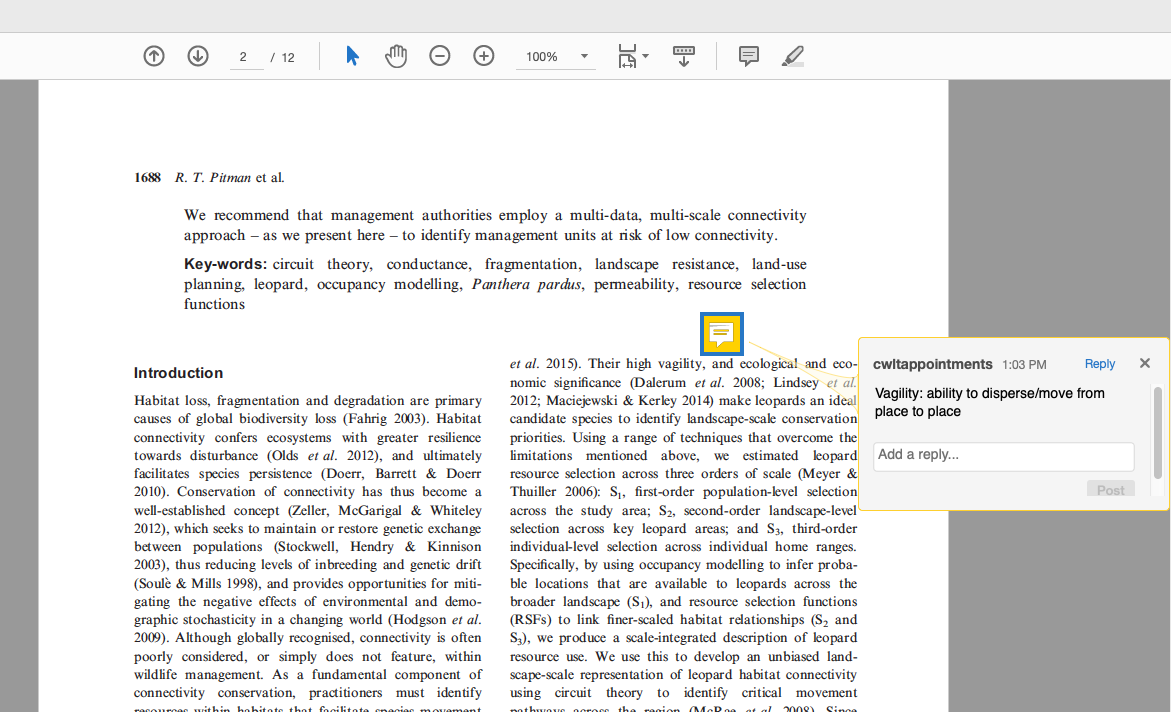
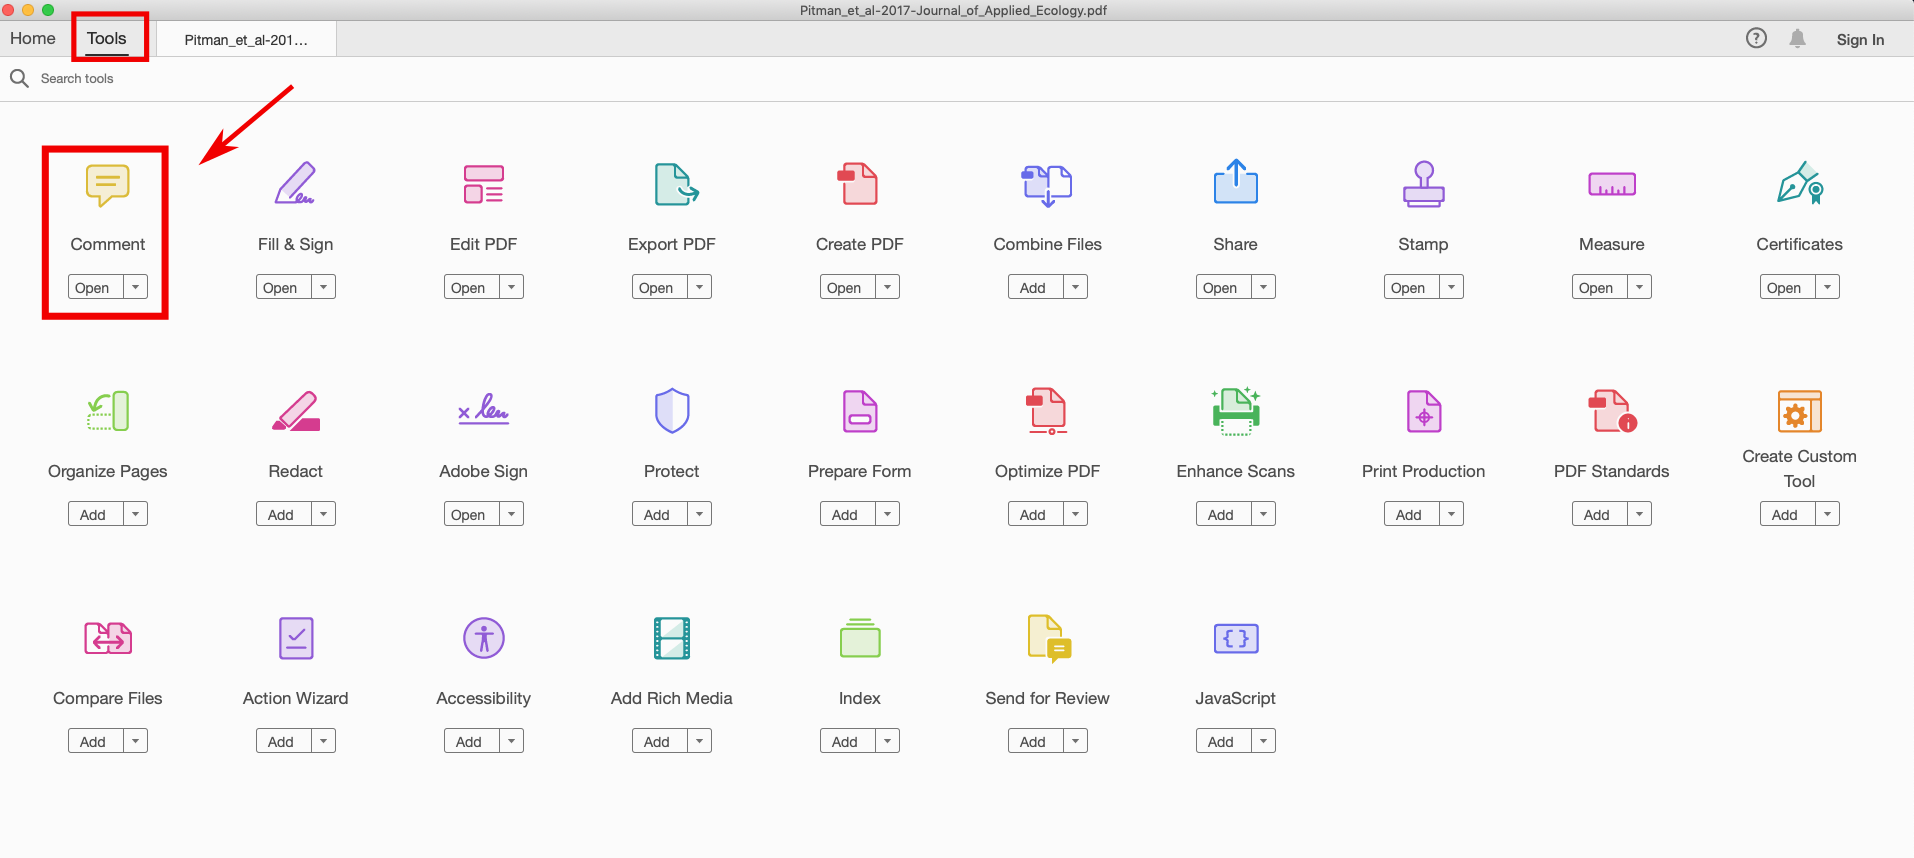
Keeping Track of Your Comments
Adobe is also really great because it keeps track of each of your comments as you add them and provides a running list of them along the right side of the screen. If you want to jump to a certain comment, simply click on the desired comment in the list and the document will take you to that comment. You can also arrange these comments by page, author, date, type, checkmark status, and color or filter them by reviewer, type, status, and color.
This image shows a screenshot of the same PDF used throughout this section, open in Adobe Acrobat. A bar on the right side of the screen is outlined in red. It shows every modification that has been made to the document, with the name of the user who made the change, time of the change, and icon indicating the type of change. Text of comments or replaced text is also present in this bar.
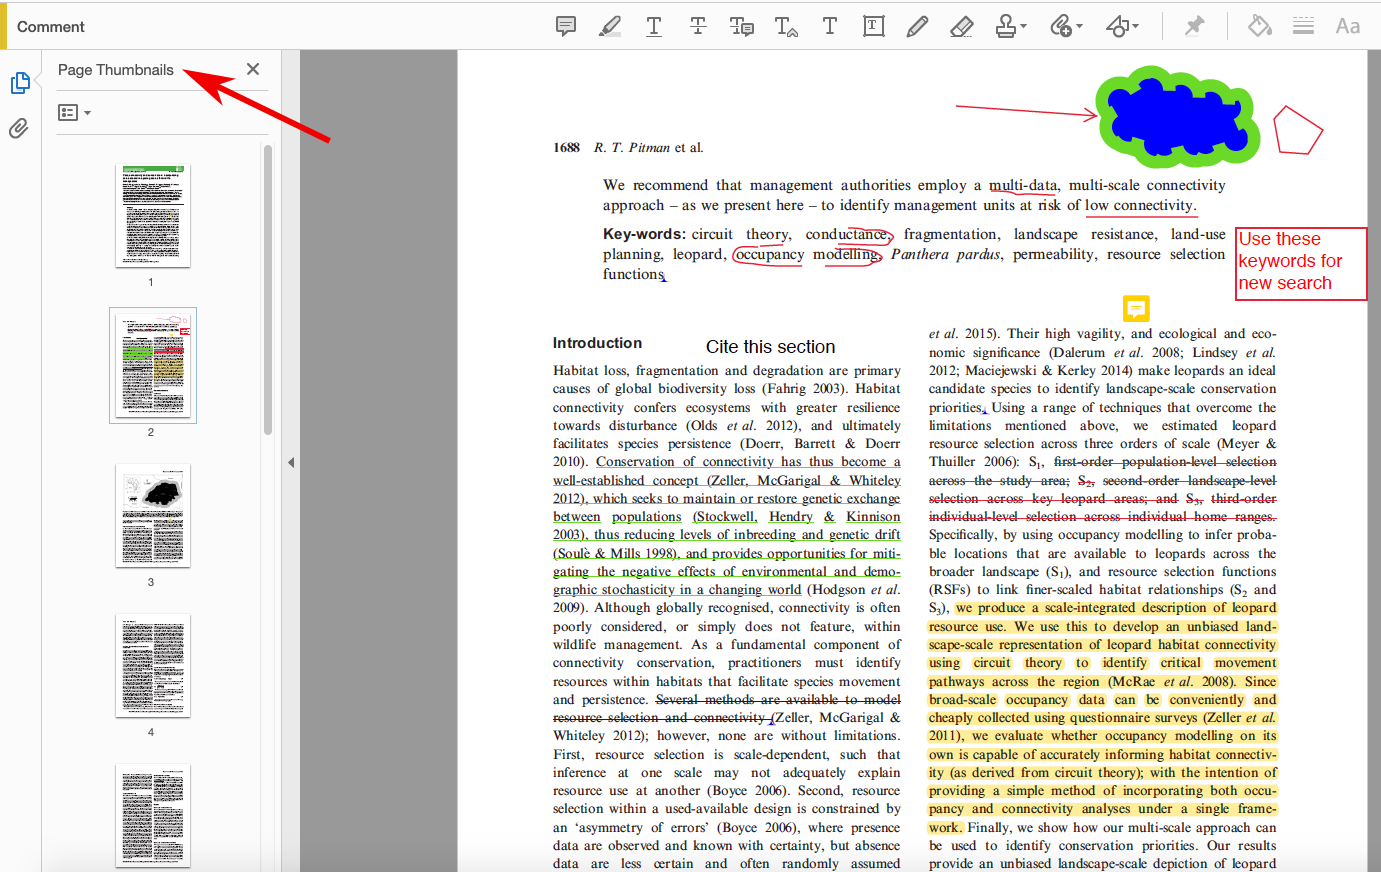
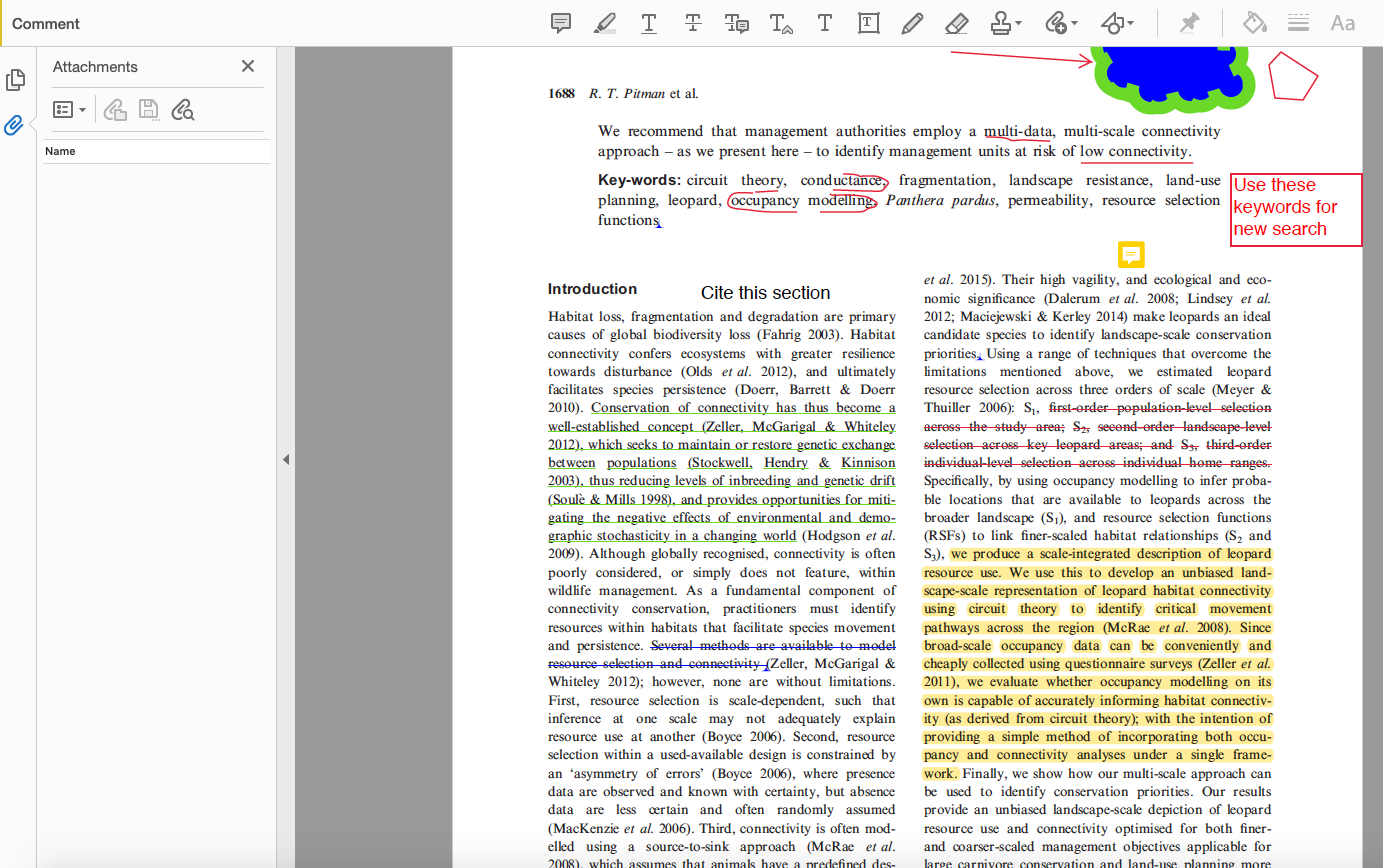
Changing the Page Viewer
There are also useful page-viewing capabilities to the left side of the screen under the “Page Thumbnails,” “Bookmarks,” and “Attachments” icons. “Page Thumbnails” will allow you to see which page of the document you are currently viewing:
This is a screenshot of the same PDF document. On the left side of the page, a bar is open with small images of each page in the document. A small title that reads "Page Thumbnails" at the top of this bar has a red arrow pointing to it. To the left of the title, a small logo showing two pieces of paper is highlighted in blue.
Or you can switch to “Bookmarks” to view an outline of the source document and click to go to a certain section:
In this screenshot, the bar on the left instead shows an outline of the document. On the far left, a small logo of a paper clip is highlighted in blue.
If there are attachments that were included in the source document, selecting the “Attachments” option will allow you to view them.
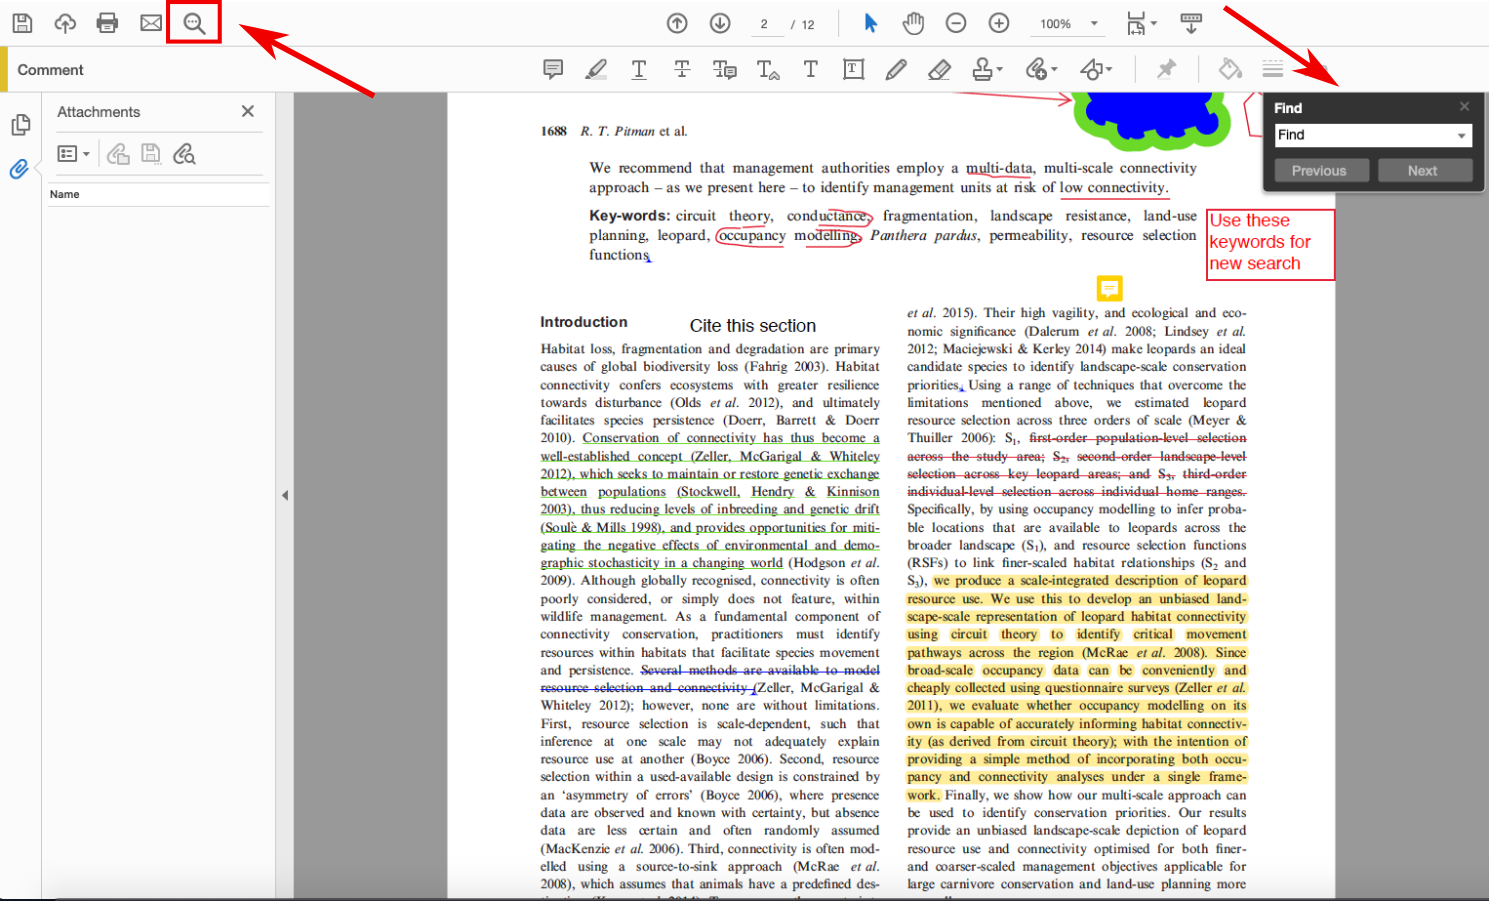
Searching the Document Source
Finally, you can search for key words and phrases in the document by selecting the “Find text” icon (magnifying glass) in the upper left of the original toolbar. A window will appear in which you can type in the word or phrase you’d like to find; selecting “previous” or “next” will bring you to each instance in the document where that term was used.
In this screenshot of the same document, the magnifying glass in the top left of the window is in a red box and has a red arrow pointing to it. In the upper-right is a small pop-up window with the text "find" at the top and a white bar for typing text. Below the bar for text are two gray buttons that read "previous" and "next."
get.adobe.com/reader/